However, what happens if I've added too much contrast and have saved my file? There's no going back unless I have the original image somewhere to undo what I've done.
 And, by then I've usually deleted the original file off my camera. DOH!
This is why you want to always use Adjustment Layers to do your editing. Adjustment Layers allow you to go back to your change and tweak your settings or, remove it completely.
Here is one way to start.

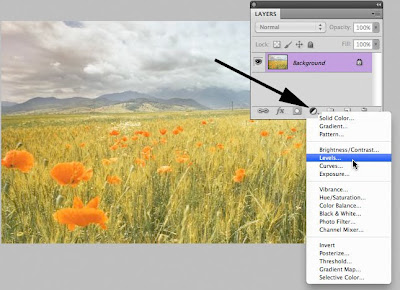
Open your Layers palette and click on the black and white Adjustment layer icon. All of the awesome editing tools display in a list. Select the tool you want to use and a new Adjustment layer appears in your layer palette. Make the changes you want and even add another Adjustment layer if desired.
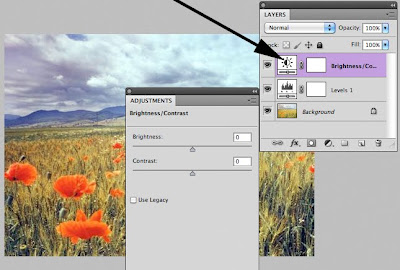
Each new adjustment now displays as a seperate layer in your layer palette.
To make changes to your adjustments just click on the Adjustment layer icon to view your previous change and modify your settings (photo 2).
The best part about using Adjustment layers is that no damage is done to your photo. If you save this file in a native .psd format you can always go back to remove, tweak or add new Adjustment layers without permanent alternations to the original photo.
If you've never used them, Adjustment layers will be your new best friend in Photoshop.
Never damage a pixel again!
Tidak ada komentar:
Posting Komentar