Let’s take a quick look at a feature in Photoshop called Actions.
An Action is a series of Photoshop commands used to automate a task thus saving you time.An example of an action would be to resize and image, change it to grayscale then save it as a .jpg file with one mouse click. Well, that sounds handy for repetitive tasks doesn’t it? The only problem is, the set of Actions that come with Photoshop aren’t really as helpful as that, and sometimes you have to create your own Actions to do what you want.
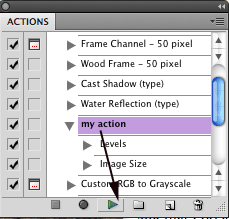
To see the Actions Photoshop has to offer, go to Window – Actions to open the Actions palette.
You’ll see a couple of fun Actions like “Wood Frame”. To try it, just open a photo, click on "Wood Frame" then click the play button in the bottom of the palette. Your photo will magically have a nice looking frame.
Well, isn't that pretty? But let's be practical. What I need is a quick way to run Auto Levels and resize to 640x480. Or, something that I do all the time. This is where I create my own Action.
Open any photo. In the fly-out menu in the Action palette select "New Action". Give your Action a name and click Record.
![]()
In the bottom of the Action palette the round button turns red to indicate recording. Don't worry about the time you take. Photoshop is only recording commands at this point. I'll fix the exposure by going to Image - Adjustments - Levels and clicking Auto. With that done I'll go to Image - Image Size and change the size of my photograph to 640x480. This is all I need to do so I'll click the square Stop button in the bottom of the Action palette to stop recording.
My Action along with the Levels and Image Size commands display in the Actions palette for me.
The next time I open a photo that I want to run Auto Levels on and then resize to 640x480 can be done by selecting the Action I created and clicking the Play button.
You can see how a complicated process can make this really handy! Isn't it nice to know that you can customize your own Action?
Just when you thought life couldn't get any better, the Batch function is waiting for you to give it a try. The Batch function allows you to run an Action (yes any Action you might have created) to an entire folder full of images! To take this to the next step all you need to do is to go to File - Automate - Batch and select your Action in a drop down menu. Photoshop will then ask you what folder you want to run this Action on.
I've found several KEWL FREE Actions available on a few sites. An Action file is a small file with a .atn extension.
To load an Action just go to the fly-out menu and select "Load Action".
Want some Free Actions? Here is a link to some neat free Action sets for you.
Want to see more about Actions? Here is a good video in detail about how they work. Enjoy!

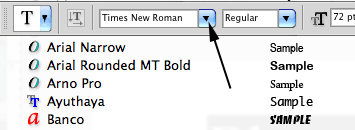
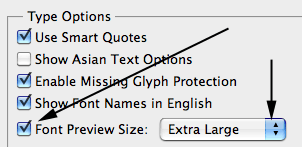
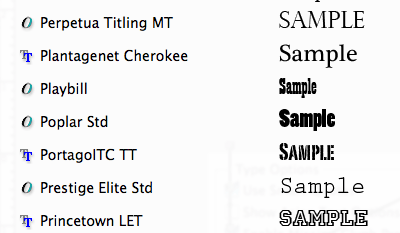
 You'll also notice that there is a drop down menu next to "Font Preview".


