propeller

Senin, 30 Januari 2012

Photoshop - Remove distortion with Puppet Warp

Besides moving appendages and creating special effects with the Puppet Warp tool you can use Puppet Warp to fix problems in photographs.
Lens correction is a great tool but doesn't always get the job done for distortion. The next time you're having problems fixing a crocked wall or horizon consider trying the Puppet Warp tool.
In my example, the wide angle lens caused some distortion on the horizon.
I fixed the distortion using Puppet Warp. The red line indicates where the distortion was before and after.
Open your problem photograph then click on Edit > Puppet Warp.
Add as many Control points as needed. In my example below I added 3.
Select a distortion point and drag the point until the distortion is removed.
That's all there is to it. Continue to drag your points until all distortion is removed.

Photoshop Beginners Article #2 Photo Editing.


One of the first things you might want to do when learning how to use Photoshop is to transform some of your old photographs making them into colourful new creations you might want to use these as gifts or just for your own creative amusment .There are hundreds of ways to do this using some of the applications found in Photoshop.There are a few main tools that will help you to do this so here I will try and introduce you to a few that I have included in these photoshop tips for beginners

The Filter Menu .
The filter menu allows you to discover all kinds of wonderful effects you can use on your photos.
 You might want the picture to look as though it was painted in pastels or oils for this you can go to Filter/Artistic/Roughpastels for example. The artistic sub menu in Photoshop CS5 has fifteen different effects, so play around and experiment a bit. The Brush Strokes menu has lots of effects to offer aswell . You can blur a background using the Blur option or you may want to use Sharpen there are endless possibilities.

The Smudge and Clone Stamp tools.
These tools can both be found on the tools menu usually found on the left hand side. They both come in handy when touching up a models appearance ,working on things like wrinkles ,scars ,spots ,and moles.The Smudge Tool does exactly what the name implies and will blur and smudge the area ,whereas with the Clone Stamp tool you can copy say a clear bit of skin to cover a pimple. Your subject is guarantied to be smiling with the results.

Image Adjustments.
If you go to the Image menu at the top there are also many things you can use to alter you photo.You can turn an image to black and white or go to Hue/Saturation and alter the amount of  colour in you picture,you can play with the Levels or Curves options or the Vibrance until you find a desired effect for your project.

There are literally thousands of different effects you can achieve using Photoshop CS5 like anything else practice makes perfect ,and you will no doubt have hours of fun along the way.

Photoshop CS6 preview

Minggu, 29 Januari 2012

Create a Realistic Rainbow in Photoshop CS5


Download background image below ↓↓↓↓

http://www.4shared.com/photo/G6xNJ7SO/Background.html


Jumat, 27 Januari 2012

Photoshop Beginners Eyeball Tutorial


Video:

.


Step 1:
 Create a new document 2000 px by 2000 px resolution 72 and background colour white.


Step 2:
 Make sure you have Black and White selected as you Background and Foreground.
 
 Go to filter/Render/Difference Clouds and do this a few times.


Step 3:
  Go to Filter/Distort/Pinch ,set this to 100% and do this twice.

   
Step 4:
  Select the Elliptical Marquee Tool holding own the Shift and Alt keys draw a circle from the centre outwards stop as you reach the edges, the go to Select/Inverse and then hit Delete on your keyboard.


Step 5:
    With the Image selected create a new Layer and fill it with black.

    Then with the Black circle selected go to Select/Modiy/Contract 100 px and then Select/Modify/Feather 50 px then hit delete then go to Layer/Merge Down.


Step 6:
     Create a New Layer above this one hold down Control and click on the Image below in the Layers Panel so that the circle is selected, with the New Layer highlighted in blue go to Edit and fill with this colour selected 06c2f8.Set the Blending Mode on this Layer to Overlay.

Step 7:
      Create another new Layer, select the Elliptical Marquee Tool holding down the Shift and Alt keys draw a smaller circle from the centre outwards Fill this with Black, then with the new Layer  highlighted in blueSelect your original circle by pressing Control and clicking on it in the Layers Panel, then go to Layer/Align Layer to Selection and Align the Verticle And Horizontal Centers. Also go to Filter/Blur/Gaussian Blur and blur by 6 px. 


Step 8:
   Open up a New Layer abover the blue circle select the Elliptical Marquee Tool holding own the Shift and Alt keys draw a circle from the center outwards making it bigger than the pupil and fill it with this colour 95a31a , you may Align this as you did with the pupil.


   Go to Filter/Blur/Gaussian Blur 180 px.


 Step 9:
    Create another New Layer above the last one draw another circle smaller than the last but bigger than the pupil and fill it with this colour cbd93a go to filter/Blur/Gaussian Blur 60 px and drop the opacity to 70%.


Step 9:
   Select the original Difference Clouds Layer at the bottom, hold Control and click on the pupil Layer, go to Select/Inverse then click on the Quick Mask Tool at the bottom of the Tool Panel and paint over some of the Iris like below,you need the Brush Tool selected with a soft Brush about 55 px.


Deselect the Quick Mask Tool and go to Select/Inverse and the holding down Control press J to copy this selection to a New Layer, drag this layer underneath the pupil.Drop the Opacity to 47 %


 Then click on the Fx Layer Styles button at the bottom of the Layers Panel and add the following Gradient Overlay.

 Step 10:
   You may want to experiment with the highlight a bit or even try multiple highlights this is a very simple one open a New Layer over the others, draw out a circle with the Elliptical Marquee Tool with a 30 px Feather.


     Then go to Filter/Blur/Gaussian blur 60 px.


Step 11:
    We are going to resize the Image and then the Canvas so go to Image/Image Size and drop the size to 500 px making sure Constrain Proportions is ticked.

   
 Then go to Image/Canvas Size and change the Height and Width to 1500 px.


 Step 11:
    Create a New Layer this need to be dragged underneath all the others  Making sure that Feather is back at 0 select the Elliptical Marquee Tool for our last circle draw out from the center again on the  New Layer , this circle needs to be twice the size of the Iris fill this with white and add the following Layer Style the way you did in Step 9.


      You may want to add a New Layer and paint in some arteries and add your own Background ..Please comment on this Tutorial if you have enjoyed it ..

Rabu, 18 Januari 2012

Photoshop Beginners Facebook Logo

Video:

Step 1:
     Open a new document 520 px by 520 px with a transparent backround.

 Step 2: 
    Select the Rounded Rectangle tool set the Radius to 50 px and the colour to 4564b8

 
Step 3:
     Add the following Layer Style from the menu at the bottom of the Layers Panel.

 Step 4:
    Change the settings on your Rounded Rectangle Tool as follows and draw a shape like the one seen below, colour is ffffff . You may Align the Layers by highlighting the Layer with the new shape in the Layers panel, then with Control held down click on the original shape Layer and got to Layer/Align Layers to Selection/ then click the Vertical and Horizontal Centers options.


Step 5:
     Go back to your Rounded Rectangle Tool keeping White as the colour and using the following settings draw ot a shape like you see below.

   
  Step 6:
    Go to View and check Rulers drag a Guide down to help you, select your Erazor Tool with a hard edge and holdin down the Shift key eraze the following area from the new shape.

   
Step 7:
    Go to the bottom of the Layers Panel and apply add a Layer Mask to the newest shape Layer, select tour Gradient Tool with a Black to White Gradient selected  drag your Gradient upwards .   


Step 8:
    Hold down Control and click on the shape to select it, press Control and T to bring up the Free Transform Tool  right click on the Tool and select Distort and drag each side of your shape in a little, then drop the Opacity on this Layer to 75%


Step 9:
   Right Click on the Image Below and save it to your desktop and drag the Image into your document and press Enter on your keyboard.  You may not see it but it is there run your mouse across  :)

 Step 10:
    Holding down the Shift key Highlight all the Layers and  go to Layer/Merge Layers.

 Step 11:
    Press Control and J to duplicate the single Layer and then with the bottom Layer selected go to  Edit/Transform/Flip Vertical.Then add a Layer mask and repeat Step 7 on your reflection 


.
  Drag your bottom Layer down to create your reflection this Image needs to be saved as  P.N.G. if you want to use it as a Docklet below is another one I made for Blogger. Please comment ...


Create a brush in Photoshop CS5


Download Tree Image
http://www.4shared.com/photo/2AC2BtsM/Tree.html


Selasa, 17 Januari 2012

15 Great FREE Photoshop Brush sites

Are you creative? Then you probably enjoy Photoshop brushes.
Here is a nice site to browse for hundreds of Photoshop brushes to create effects like shown below.
Need to learn how to load these brushes into Photoshop?
Check out my previous blog for instructions.
Brushes!

Senin, 09 Januari 2012

Photoshop Free Textures

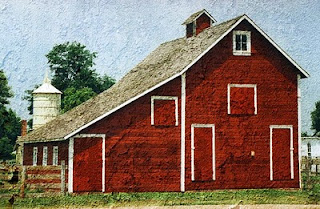
There are a lot of wonderful things you can do with textures. For example, in a previous post I showed you how to create a beautiful textured effect on a photograph as shown on the left.

I wanted to share another site with thousands of free textures that you can select from and download.

Enjoy experimenting with your photographs using some of these amazing textures!