propeller

Kamis, 29 November 2007

More Special Effects with Text

Just when you thought life couldn't get any better...here is a slick way to create Text Effects that will get noticed. Just follow these steps to add a lot of interest to your web sites, brochures or however you want to use them.
  1. Create a blank canvas by going to File, New.
  2. If creating a text banner for a webpage enter page dimensions of 700 pixels wide and 300 pixels tall. If for print, adjust the size needed in inches.
  3. Add a font with large bold type. Type in your text.
  4. Open the Styles palette if it isn't already open. Go to Windows and select Styles to open the palette.
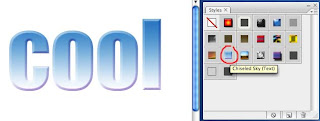
  5. Here you will see several style options. Click on a style to see a preview of what it does to your text. Continue to do this until you find a style you prefer.
That's pretty neat. However, it gets even better!
  1. Go back to the Styles palette and click on the dropdown menu in the upper right hand corner. (see photo)
  2. A menu appears with numerous style palettes that can be added to the options you already see. These are listed on the bottom half of the menu.
  3. I selected "Text Effects" and then told Photoshop to Append these styles to the bottom of my Styles palette. This way, I can just keep adding to all the styles I might want to use.
  4. The new styles now appear on the bottom of the Styles palette.
Note: You can always reset your Styles palette back to its original state. Just return to the drop down menu in the Styles palette and select "Reset Styles..." and click"OK" to return to the default Styles that were available.

Rabu, 07 November 2007

Pasting Images into Text

Have you ever seen a photograph that was pasted into text? This neat special effect is really quite simple to do in Photoshop or Photoshop Elements. Here are the steps you’ll need to follow.
Selecting an Image
Your image needs to be at least as large as what you want your finished text image to be. Your image can be of virtually anything you want. It could be a field of flowers, a landscape, sunset etc. Open your image into Photoshop and follow these steps:
  1. To select all of your image do a “Select – All”
  2. To copy this image into memory do “Edit – Copy”.
  3. Create a new blank canvas in Photoshop by going to “File – New” (notice that Photoshop creates a canvas size exactly the same size of the image that you copied into memory)
  4. Select the Text Tool and select a font that has bold or wide letters. In my example, I selected Impact with a font size of 180
  5. To select a letter use the Magic Wand tool and click on the first letter. Hold down your shift key and continue selecting letters until all of your letters are selected. (You’ll see the “marching ants” indicating the selection.)
  6. With all of your letters selected go to “Edit - Paste Into” (be sure not to select just Paste)
  7. Now that your picture is inside your text you can use the Move Tool to adjust how your image sits inside your text
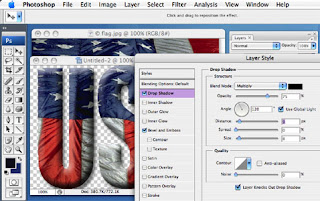
  8. You can now add the final touch by going to “Layer – Layer Style – Bevel and Emboss”. You may also want to add a drop shadow by clicking on the Drop Shadow box. Each of these special effects can be adjusted by using the slider bars provided.
  9. You can now save your file as .jpg, .pict or whatever format needed.

For a .pdf of these instructions click here.