propeller

Rabu, 28 Mei 2014

Interactive Web App for Photoshop or Lightroom shortcuts

Confused about where the shortcut keys are for Photoshop or Lightroom?

To become effective when using your software, you need to learn your shortcuts.
Here is a nifty visual shortcut application to quickly show you the shortcuts.
An additional feature takes it over the top.
As you would when using the application, hold down the shift or Crtl keys to watch the shortcuts change.
Knowing and using the keyboard shortcuts will allow you to be much more productive in your work.
http://waldobronchart.github.io/ShortcutMapper/#AdobePhotoshop

Senin, 07 April 2014

Photoshop for your tablet

Much better than Photoshop Express, the new Photoshop Touch will amaze you.
Use your Photoshop magic to edit your photos with your iPad, Android tablet or your smart phone and quickly share them directly to your favorite social network site.
While not free, Photoshop Touch is well worth the $10 investment and you'll find this new version of Photoshop Touch a big improvement over Photoshop Express.
http://www.adobe.com/products/photoshop-touch.html

Senin, 03 Maret 2014

Photoshop CC - Camera Raw Filter and the Adjustment Brush


In my last post I talked about the ability to use the new filter "Camera Raw" on a photo.
The controls in the image adjustment tabs of Camera Raw allow you to edit the color and tone of an entire photo.
However, what if you just want to adjust a specific area of a photo, like dodging and burning? You can use the Adjustment Brush tool to do just that.
The Adjustment Brush tool lets you selectively apply Exposure, Brightness, Clarity, and other adjustments by “painting” them onto the photo.
You'll find the Adjustment Brush in the top  menu bar of the Camera Raw menu window. Adjust the size of the area you want to "paint" an adjustment tool by using the left and right bracket keys. Then, before you start painting set your raw filter controls to create the effect you want then start painting these effects on your photo.
 What's nice about this is if you've created a "Smart Layer" of your photo the Camera Raw filter becomes a Smart Filter. (What is a smart filter?) Then if you decide to remove or edit what you've done you simply select your Smart Filter to make adjustments.

Below is an example of my Smart Layer with a Smart Filter.


Senin, 10 Februari 2014

Photoshop CC - Camera Raw Filter

I've been playing with the new Photoshop CC version and exploring some of the new features since CS 6. Here is another feature that I wanted to share with you.
One of the new features in Photoshop CC is the Camera Raw filter.
If you've never worked with Camera Raw, here is a chance to start.
Camera Raw is now included under the filter menu.
Before, you had to use Lightroom or open an image that was in the raw format to access these tools. (What is a raw file or image?) Now, they are as handy as other filters available in Photoshop.
 Many of the tools in the Camera Raw filter will look familiar to you. However, there are many goodies here that if you've never used Camera Raw before, you'll love using.
One of these tools is the "Clarity" tool.
In the example below, I adjusted clarity to give more definition and contrast, increased vibrance and added a few more adjustments to my image. You can see the differnce from before on the left to my adjusted image on the right.

Where it really gets interesting is in the fact that if I convert my layer to a Smart Object (what is a Smart Object) I can use the Camera Raw filter as a nondestructive filter!
 
Additional Photoshop goodies with no harmed pixels. How great is that?

Jumat, 24 Januari 2014

New features in Photoshop

Want an easy way to quickly see what new features have been added to Photoshop?
I've just installed Photoshop CC and the jury is still out on this new "rental" agreement with Adobe as far as my opinion is concerned.
But I wanted to share with you how you can quickly see new features in the new Photshop CC. Now with the promise of automatic updates,  I'm not sure how this feature will work when the software does the updates automatically.
However, here is a way to see the the changes from CS 6 vs. CC for now.
Go to "Windows" and select "Workspace".
Here you will find a "What's New" option.  Select this for now.
What happens is that Photoshop will highlight in blue any areas that have a change or have been added. You can quickly go from any dropdown menu and easily see if something has changed.
While there are no instructions on what has changed you can get into these areas and play around to see what is different.
For more detailed information about the changes you'll want to go directly to Adobe's site to see what all has changed.
http://blogs.adobe.com/photoshopdotcom/2013/06/getting-to-know-new-features-in-photoshop-cc.html

Later, after checking the new features out you'll probably want to turn this off by going back into Windows, Workspace and selecting "Essentials (Default).


Jumat, 17 Januari 2014

New in Photoshop CC - Image Size improvement

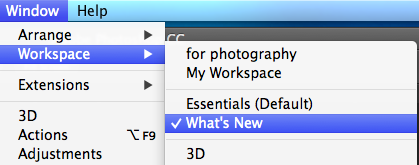
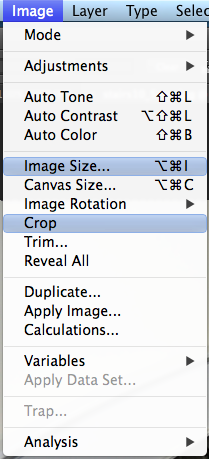
Lets take a look at one of the changes in the new Photoshop CC with "Image Size".
It's never a good idea to upsize an image. When you upsize an image information has to be created that doesn't exist in order to make the image bigger.
It's always best to rescan or reshoot the image at a higher resolution to get all the data you need.
However, sometimes that isn't possible and you need to upsize the image.
The resize dialog box has changed a bit. For example, the constrain porpotions needed to keep the image from being distorted is now just a chain link between width and height.
Also, I get a preview of my image allowing me to see changes in quaility as I resize. This is helpful to see any artifacts and other uglies I'll be getting as I upsize before I hit the OK button instead of  having to go back and undo the upsizing. So, it's easier to decide how much upsizing can be done.
The best part of the new "Image Size" is the way Photoshop CC now does an intelligent job of upsizing!
Now, Photoshop is smart enough to make better calculations of adding additional pixels and keeping some of the details in tack.
Take a look at the example I did of my old barn when I upsized the image with both Photoshop CS 6 on the right and Photoshop CC on the left.
With Photoshop CC, I'm seeing a lot more details especially in the tree area and shadow detail on the barn.
It's looking like a little more effort has gone into the "Image Size" tool to get noticeably better results and the Preview window let's me know how far I can push the resize before the image is beyond acceptable.
So, it's still not a good idea to upsize an image. But, if it has to be done you can feel a little more comfortable letting Photoshop CC give it a shot.