propeller
Kamis, 29 Desember 2011
Selasa, 27 Desember 2011
Photoshop - What is Threshold?
 There are several ways to adjust the dark and light areas of a photograph. I usually use the Levels tool but you might want to take a look at a tool called Threshold. Let's take a look at how I fixed my old family photo taken in Austria.
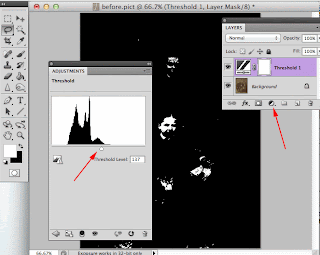
Start by creating a new adjustment layer using Threshold. The Threshold tool allows me to see what areas should be white and black in this faded old photograph.
Slide the triangle from right to left to see what should be white. In this example it was the paper in the hands of the family.
Then I slide the the white triangle from left to right to see where the blacks came in. The first data seen was below the skirt.
Knowing this I created a new adjustment layer - Levels. I selected the white eye dropper for the paper and the black eye dropper tool for the shadow under the skirt. And TA DA! I have a restored photograph!
If desired, use the mid-tone eyedropper to select what should be about 50% gray. Keep clicking with the mid-tone dropper until you like the finished results.
Here is a movie on how I did this.
Kamis, 22 Desember 2011
FREE Gift Tags
A gift for you that's just in time.
Free gift tags!
Select your favorite then just print them out.
http://www.freeprintablegifttags.net/
HAPPY HOLIDAYS TO ALL MY PHOTOSHOP FRIENDS!
Free gift tags!
Select your favorite then just print them out.
http://www.freeprintablegifttags.net/
HAPPY HOLIDAYS TO ALL MY PHOTOSHOP FRIENDS!
Rabu, 21 Desember 2011
Photoshop Beginners Samurai Fantasy
Step 1: First download the files using the resources button and open up a new document 1500 pixels by 1000 pixels.
Step 2: Open up your background Image from the files you downloaded and paste or drag it into your document. Bring up the Free Transform Tool 'Ctrl + T' on the keyboard and position the Image as seen below.
Step 3: Go your layers palette and select the brush identified below and using the color #703500 and using the brush settings you see also below paint as shown.
Step 4: Now open the Tree Image from the files you downloaded and go to Edit/Define Brush Preset. You will now find your new Tree Brush at the bottom of your Brushes. The screenshot says 'Images.jpg' you may call your Tree Brush whatever you like.
Step 5: You can now use you Tree Brush to paint in along the to of you tree line as seen below. Change the size jitter on your brush to 46%.
Step 6: We make another layer for our second tree line and the small hillock use an ordinary hard brush for the hillock and follow the same process as before on the new tree line using this color #4f2807
Step 7: One more layer of trees using this color #4f2807 you can then alter the color slightly making it a little bit darker here and there something like this.
Step 8: We can now start to name our layers, you may do this from the very beginning if you wish. Click on the name in the Layers Palette and enter you chosen name we will do this now with each layer as we progress. We are going to add some grass on a New Layer over the top of the trees use these colors #9d4b1b and #a27416 with the brush settings shown.
Step 9: Make another Layer and cover the hillock with grass using the same techniques as in the last step only make the brush a little bigger.
Step 10: Next we go to Filters/Render/Lighting Effects and use the following settings on the Grass 2 Layer.
Step 11: Now we will add another grass Layer with the brush size set to 119 px and using #642a08 and #815212 as our Foreground and Background colors.
Step 12: Add now a couple more Layers of grass going darker the final one uses Black and a very dark Brown as the Foreground and Background colors.
Step 13: Drop back to the Layer we have called Grass 2 create a Layer above this Layer, hover over the line between the two Layers in the Layers Palette pressing the Alt key and create a Clipping Mask. Using #febb10 as your color and a medium soft brush paint as shown below. Drop the Opacity to 50% on this Layer and then go to Filter/Blur/Gaussian Blur and Blur by 27.8 px.
Step 14: Go to your downloaded resource files and open up the rock outcrop. Using the Quick Selection Tool make a Selection as shown.
Step 15: With this new selection go to Edit/Copy then jump to your original document and with the Layer Grass 1 selected go to Edit/Paste to import your rock outcrop. Then press 'ctrl ' + 'T' to bring up the Free Transform Tool and reposition the rocks like this.
Step 16: Make a copy of the rock Layer by pressing 'Ctrl' + 'J' with this Layer selected 'click on the icon in the Layers Palette holding 'Ctrl' Select your Gradient Tool and drag the Gradient below across the selection, then drop the opacity to 80%.
Step 17: Create another Clipping Mask over the rock color Layer and using #feb10a as your color paint in some highlights, drop the opacity to 69% and go to Filters/Blur/Gaussian Blur and select 9.0 px
Step 18: Back to your source files now open the Figure copy and paste it into your Document re size slightly using your Free Transform Tool this Image has already been cropped for you. Then we are going to use a Filter you need to go to Filter/Filter Gallery/Brush Strokes and follow the settings shown below. You need to place the figure between Grass 4 and 5 Layers.
Step 18: Now go to Image/Adjustments/Match Color and follow the settings.
Step 18: Duplicate the Figure Layer by pressing 'Ctrl' + 'J' and then add the following Layer Style.
Step 19: Now carefully using a your Eraser Tool with an Opacity of around 15% start to carefully Erase from this Layer until it looks the way you want it to. You may add some highlights and fill the gap below the rocks with some foliage or grass I have included some Brushes for this.
Senin, 19 Desember 2011
Article/ Posted 21/09/2012
This is a beaufully written article by Tom Giannattasio that I found over at Smashing Magazine. G Go to Artcle
G
This is a beaufully written article by Tom Giannattasio that I found over at Smashing Magazine. G Go to Artcle
G
Photoshop - create snow effects on photograph
Let's take a look at how you can create the illusion of snow coming down on a photograph in only a few steps.
- First make sure you have Photoshops default colors of Black as the foreground color and white as the background color.
- Create a new layer - Edit > Fill > 50% gray
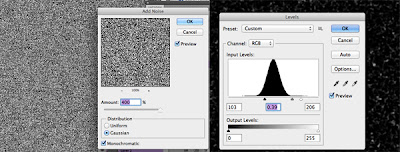
- Filter > Noise > Add Noise (400% Gaussian with Monochronmatic)
- Filter > Blur > Gaussian blur (2.0 pixels)
- Image > Adjustment > Levels (move triangle slides to the right until it looks like snow)
- Change the blend mode of this layer to Screen

- Enjoy the home made snow!
Senin, 12 Desember 2011
Free Holiday Templates for your photos
Just in time for the Holidays!
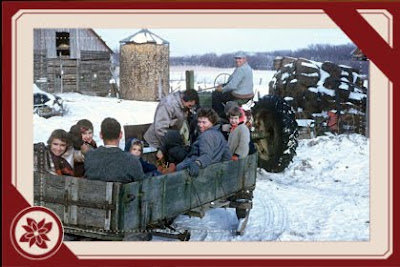
I'm repeating an old post because it's still one of my favorites.If you want to print out photos to include in your holiday mailings, how about adding a really festive border first?
HP Creative Studio has numerous frames that you can upload and drop a photo into. There's no need to even create an account. Just upload some photos and drag and drop them into the frame of your choice. Then, select print and print it out on some nice photo paper.
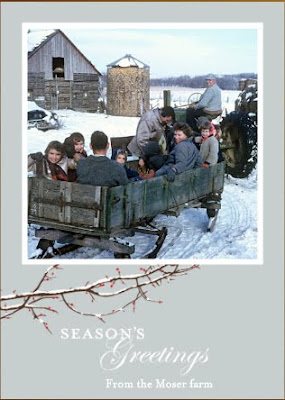
 What about creating your own custom greeting cards? Yup, you can do that too!
 HP Creative Studio allowed me to add some custom text both inside and out and allowed me to print my card directly to my printer.
How about custom gift tags? They even have a template that allows you to drop your own photo into. And the best part of course....it's all FREE.
How neat is that!? Click on the link below to enter their site.
HP Creative Studio
Happy Holidays!
Leona :-)
 Click on the link below to enter their site.
HP Creative Studio
Happy Holidays!
Jumat, 09 Desember 2011
Great Christmas Fonts
Want to make your Christmas letter or card look awesome?
Enjoy these FREE Christmas fonts!
http://www.howtogeek.com/howto/37226/desktop-fun-merry-christmas-fonts/
Enjoy these FREE Christmas fonts!
http://www.howtogeek.com/howto/37226/desktop-fun-merry-christmas-fonts/
Senin, 05 Desember 2011
Photoshop Diasters!
This week instead of focusing on what you should do in Photoshop. I'd like to share what you should never do in Photoshop.
These should make you smile and feel better about any Photoshop "oops" you may have had in the past.
These should make you smile and feel better about any Photoshop "oops" you may have had in the past.
Holiday Bonus
Do any online shopping and wish you had that coupon code to plug in??
Check my other Blog where I share various computer tips and tricks.
Langganan:
Komentar (Atom)


